Lets start creating a campaign by pressing the ‘Create campaign‘ button on the App main page. This button is available on top of the page in the ‘Setup Guide‘. Alternatively, as you scroll down on the App page we have a section which lists all your campaigns, you will see a ‘Create campaign‘ button.

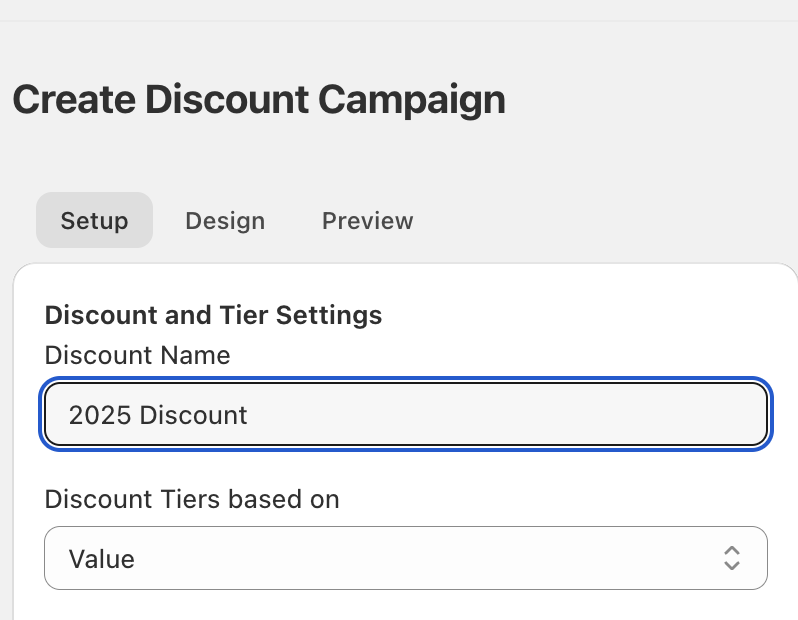
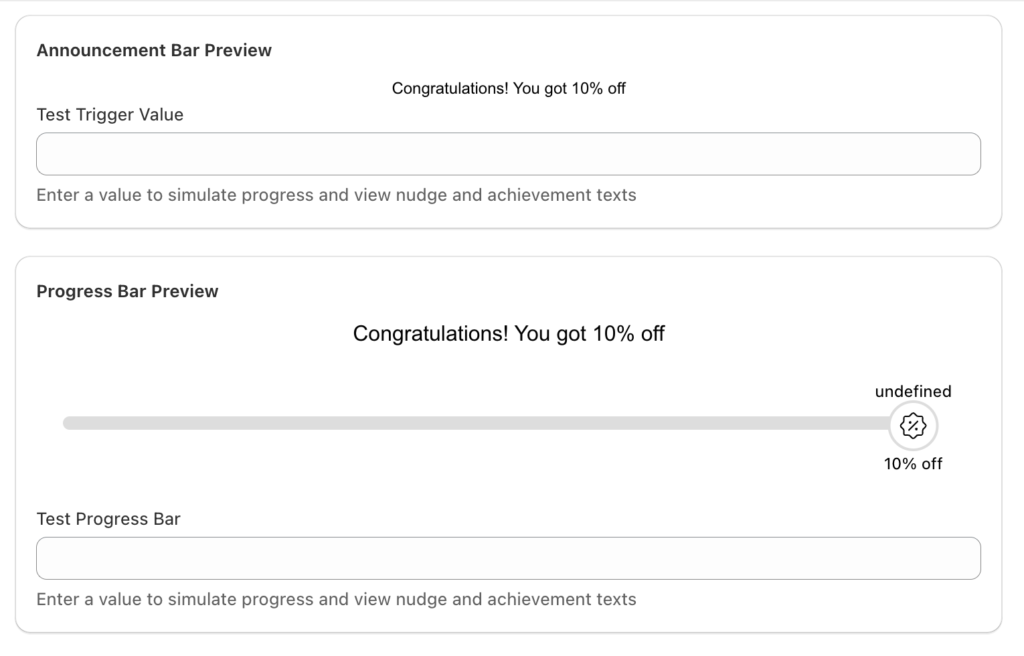
The Campaign creation page has 2 parts, the left side where you can configure the settings of the campaign and the right side which shows a preview as you set it up.
The top half of the page shows 3 options: Setup, Design and Preview.
Setup tab – This is where you do bulk of the work, configuring the campaign, setting up the values etc.
Design tab (you can read more about in a later post) – This is where your configure the look and feel of the campaign (as per your brand style, yes, everything is fully customizable) and decide the placement of the progress bar.
Preview tab – This simply generates a preview of the progress bar campaign so that you can see how it looks before you hit ‘Publish‘ and all your customers see it.

You can configure either of these 2 types of Discount campaigns:
Value based – Value based campaigns allow you to offer discounts when a customer reaches a certain value threshold/goal in their cart. For example – you can offer discounts when a customer has shopped worth $50.
Quantity based – Quantity based campaigns allow you to offer discounts when a customer adds a certain quantity of products in their cart. For example – you can offer discounts when a customer has added atleast 3 products in the cart. A classic use case of this – Buy 3 get 1 Free!
Once you have decided between a Value or Quantity based campaign, you need to simply fill out the form and setup values for different tiers. You can setup any number of tiers in a campaign.

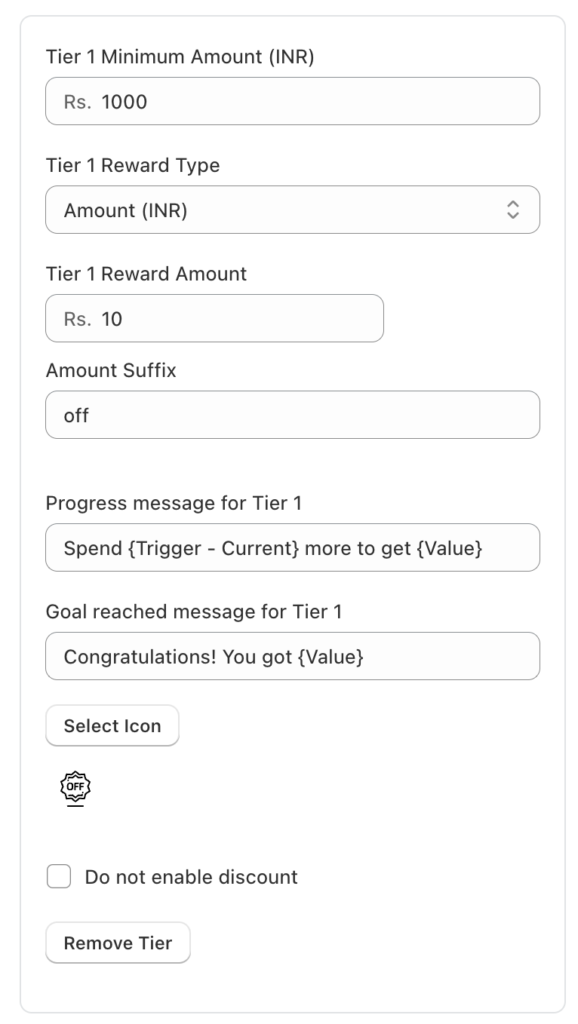
The fields to setup in a Tier are as below:
- Minimum Amount – This is the minimum tier value at which a discount is offered to a customer
2. Reward Type – There are 4 types of rewards that can be offered – Amount, Percentage, Free Shipping and Free Gift
3. Based on the Reward Type selected you will be asked to fill in a value for Amount / Percentage or choose a Free Gift (in case of Free Gift reward).
Note: You can only choose a product variant as a Free Gift reward.
We also have 2 types of Free Gift rewards. More on that later in a new post.
4. Amount Suffix – You can choose to configure any text instead of using ‘off’ for Amount or Percentage discounts ($10 off or 10% off)
5. Progress message – This is the nudge message a customer will see on your store to push them to reach a goal.
{Trigger – Current} is the amount remaining to reach the goal.
{Value} is the reward they get when they reach the goal. For example – Free Gift
Example of a nudge message – Spend $50 more to get Free Shipping
Note: Do not change the texts: {Trigger – Current} and {Value}
6. Goal reached message – Congratulations! You got {Value}
You can change the text and can also add an emoji also in the text to make it more fun and eye catching for your customers.
7. Reward Icon – We have options (3 icons) to choose from.
8. Do not enable discount – This checkbox allows you to setup a tier which doesnt apply any discounts on the store for your customer. Use this option when your actual discount is being powered by another App (BOGO, Kaching etc or using Shopify discounts) and you dont want to change that
Once you have filled in a tier details, you can choose to add another tier and so on.
Note: A campaign with more than 4 tiers or values which are very close to each other might not look the best on the mobile screen. The limited space makes it difficult to squeeze in all the text and hence might be best configure it in a way which is mobile friendly.
Dont forget to keep an eye on the instant Preview on the right side to see how your campaign will look on your store.

Once you are done setting up the campaign you can choose to Save as Draft or Publish and go live on your store.
We will dive into Design settings and Advanced Settings in the next few posts! Feel free to comment below or email us your questions.

Leave a Reply